Modern AI for everyone
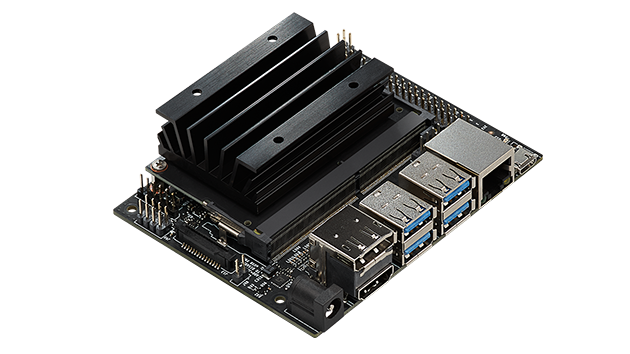
The Jetson Nano is the latest addition to Nvidia’s Jetson line of computing boards. These single-board computers bring the power of GPUs to a small form factor with a low-power envelope, making them perfect for deep learning applications on embedded devices. You might notice a common trend browsing the Jetson success stories that Nvidia showcases: they all come from companies. While this can be mostly justified by the large resources that companies can allocate to projects, at least part of the reason is that previous Jetsons were not particularly cheap. With prices ranging between $365 for the Jetson TX1 and $1299 for the super powerful Jetson Xavier, they weren’t very attractive for the DIY enthusiast crowd who might have longed for something like a Raspberry Pi with an entry-level Nvidia GPU. After all, if you have a few hundreds of dollars to spare, why not invest the money in a discrete desktop GPU?
The Jetson Nano is here to change all that. ARMed with a 1.4 GHz quad core Cortex A57 CPU, 4 GB RAM, and a 128 core Maxwell GPU, the tiny Jetson is ready to “bring the power of modern AI to millions of devices”.

While Nvidia provides some cool demos for the Jetson Nano, the goal of this series is to get you started with the two most popular deep learning frameworks: PyTorch and TensorFlow.
Contents
Before we get to the actual deep learning part we will first go over the setup procedure for the Jetson Nano. In this post we’ll go through the following steps:
Setting up your Jetson Nano
Flash the OS and boot up
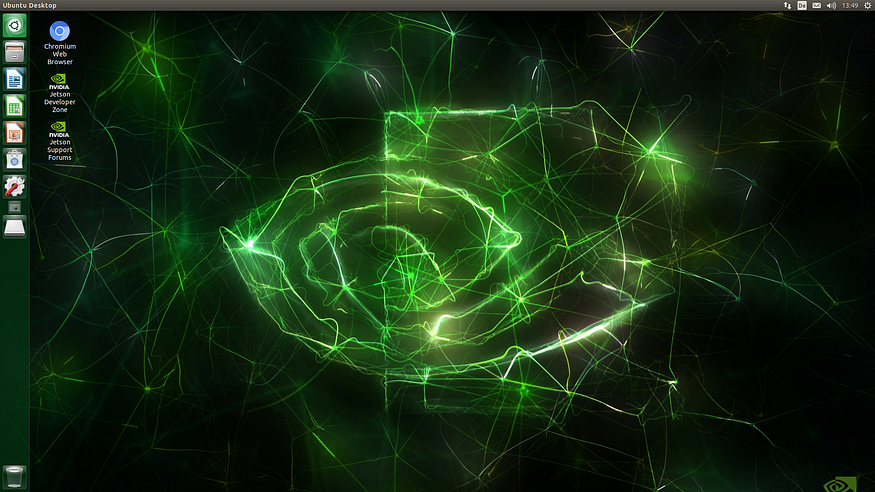
The Jetson Nano runs an ARM-compatible version of Ubuntu 18.04 which you’ll have to flash to an SD card using your laptop or desktop. Consider that the Nano does not come with any dedicated storage — the SD card is all you’ll get. So make sure to use one that is large and fast! Follow Nvidia’s instructions to get Ubuntu up and running on your mighty Jetson Nano.
Don’t worry if your SD card will appear to have a smaller size after flashing, it will be expanded to its maximum capacity in the first boot of the Nano. Speaking of its first boot, the setup sometimes appears to get stuck at “Applying changes” with the message “Waiting for unattended-upgr to exit”. It doesn’t always happen but if it does just have patience. Mine once took 25 minutes to complete.

Control it through SSH
Instead of working directly on the Jetson you could control it through SSH from your own computer, which is what we recommend. During the initial phase of setting everything up and installing libraries you might have to run commands following instructions you’re reading from some website, such as the one you’re currently on :) The Chromium web browser is installed by default but even a few tabs can be tough on the 4 GB RAM that the Nano comes with when installing some packages. Plus, working from your desktop or laptop probably feels more comfortable anyway.
You can use SSH in Ubuntu, macOS, and Windows 10 (post the April 2018 update). To control the Jetson Nano through SSH you need to have it connected to the same local network through Ethernet or Wi-Fi.
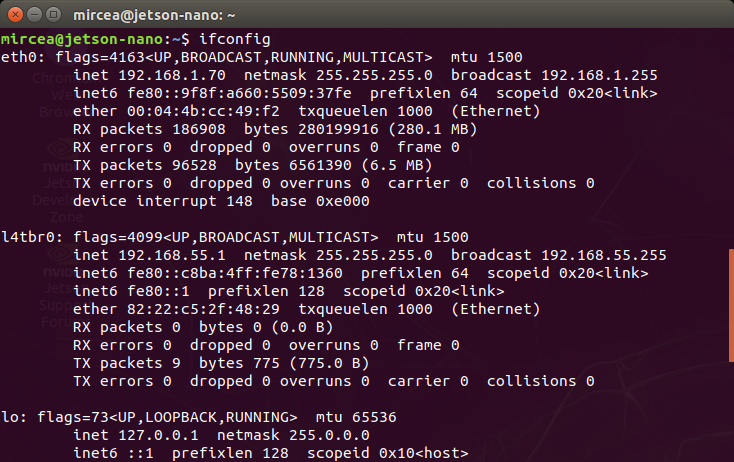
- Find its network address by running
ifconfigon the Jetson. The output should look something like below:

- Run
ssh mircea@192.168.1.70on your desktop or laptop, where you replacemirceawith your user name on the Nano, and192.168.1.70with the IP address that you found throughifconfig. - It will warn you that the authenticity of the host can’t be established. Type
yesto continue, enter your Jetson Nano password, and you're in!
Now that you can SSH in the Jetson from your own computer feel free to disconnect the monitor, keyboard, and mouse and free up some space on your desk!
What to do if SSH stops working
If you set up SSH and afterwards you reflash the SD card and restart everything from scratch, you’ll get an error message:

- If you’re using Ubuntu or macOS, simply run the suggested command
ssh-keygen -f "/home/mircea/.ssh/known_hosts" -R "192.168.1.70"
where you replace
mircea with your own user name and 192.168.1.70with the IP address of your Jetson Nano. if using macOS adjust the path accordingly.- If you’re using Windows, take note of the number shown at the end of the line starting with
Offending ECDSA key in. In the Windows example above, that number is 3. Now edit theknown_hostsfile with:
notepad C:\\Users\\Mircea/.ssh/known_hosts
where you replace
C:\\Users\\Mircea/.ssh/known_hosts with the path you see in the error message. You can simply copy paste the path. Now delete the offending line shown in the error message and save the file. The line should contain the IP address of your Jetson.Create swap file
With only 4 GB of RAM available, the Jetson Nano can become unresponsive if the memory gets filled up. To avoid that you can create a swap file that will at least keep it going while you clear things up. To create a 4 GB swap file run the following commands:
sudo fallocate -l 4G /var/swapfile


sudo chmod 600 /var/swapfile


sudo swapon /var/swapfile


sudo mkswap /var/swapfile


sudo bash -c 'echo "/var/swapfile swap swap defaults 0 0" >> /etc/fstab'
/etc/fstab' is part of the command above it and not a command on its own. To check that everything worked correctly run free -h. Swap should show 4,0G or whatever other size you've chosen for the swap file.Upgrade software
To ensure everything installed so far is up to date, first update your package list and then upgrade all installed packages with the commands:
sudo apt-get update


sudo apt-get upgrade
It’s a good idea to reboot the system with:
sudo reboot
Install pip
Python’s standard package installer pip does not come pre-installed on the Jetson Nano. Install it with:
sudo apt install python3-pip
Use virtual environments
It’s considered best practice to use virtual environments for your Python programming needs. You might be familiar with conda, but unfortunately it can’t be installed on ARM. Instead you can use the Python3-venv packagethat can be installed with:
sudo apt install -y python3-venv
The following command will create a folder
python-envs if it doesn't already exist, and a new virtual environment in /home/mircea/python-envs/env:python3 -m venv ~/python-envs/env
To activate the environment run:
source ~/python-envs/env/bin/activate
The terminal shows you that the environment is active by displaying
(env)before your user name. To deactivate the environment simply run deactivate.
Make sure you also install the wheel package in every environment you create as it is required for the installation of many subsequent packages. Do this with:
pip3 install wheel
We recommend creating a new virtual environment for every major project you undertake. It allows you to install specific package versions and gives you the peace of mind that you can simply delete the environment and start again if something goes wrong. Much easier than going through the whole Jetson setup again.
Setting up Jupyter Notebook
Jupyter Notebook makes it easy to create and share documents that contain live code, equations, visualizations and formatted narrative text. It’s a great way to get started with Python if you’re not familiar with it already.
We recommend installing every package in a virtual environment, as described above. To install Jupyter notebook run:
pip3 install jupyter
Jupyter Notebook through SSH
We recommend using your own computer’s browser for accessing Jupyter notebooks on the Nano. Running the browser on the Jetson requires resources that would better be allocated to the actual deep learning part. To access the Jupyter server on the Jetson, we use SSH tunneling. The command for SSH tunneling works in Ubuntu, macOS, and Windows 10 (post the April 2018 update). Run it on your own desktop or laptop in a new terminal that you must leave open (alternatively exit the current SSH session by pressing Ctrl+D):
ssh -L 8000:localhost:8888 mircea@192.168.1.70
Of course replace the user name and IP address with your own. Now whatever is running on the Jetson Nano on port 8888 (the default for Jupyter Notebook) will be accessible on your own machine at port 8000. Use 8000 or above for local ports, since they are more likely to be available.
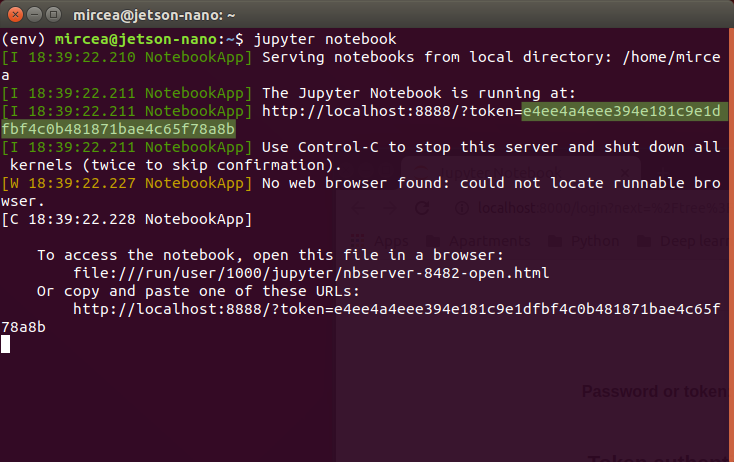
Start the Jupyter server on the Jetson with
jupyter notebook, then go to http://localhost:8000 on your own computer. You should be greeted by a page with the Jupyter logo and a field that asks for a token or a password. You can read about how to use passwords but for the sake of brevity we'll use tokens here. The token is all that comes after http://localhost:8888/?token=. Copy paste it in the browser and you should be good to go!
What next?
Now that you have your Jetson Nano set up just the right way, we can get to the good stuff. Check out our image recognition PyTorch tutorial!
Mircea Stoica is a Machine Learning engineer at Heldenkombinat Technologies. He’s into deep learning and pizza. Follow him on Twitter!


沒有留言:
張貼留言